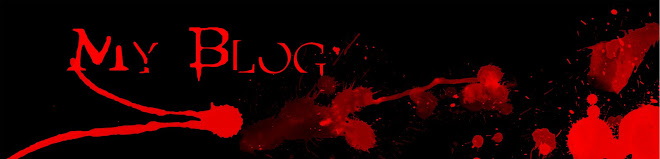


We then learnt about logos and banners and how we could create our own banner. To do this we opened up adobe elements and opened a new blank project, from there we opened up a page using the preset A3 so we now had a blank A3 page. First I changed the background colour to black using the fill tool; I then opened up a new layer and started to design my banner on there. For our banners we used different types of brushes, this meant we needed to download more brushes for adobe elements. To do this first we had to find a website which had brushes. I chose to use http://www.brusheezy.com/ to get my brushes from and chose to use the brush called “More drips and splats”. I loaded this brush into adobe elements and used it on my new layer. Once I had arranged them in a way that I liked, I then added in text that this was my blog because I was going to use this logo for my blog. Once I had finished this I opened a new page and used the same A3 preset. I then did the as with my logo, I made my blank page black, added a new layer then loaded the “More drips and splats” brush. I then used this brush on the top of my page only. I added in a text saying “My blog” I then cropped off the bottom of the page leaving just the top to use as my banner for my blog.
No comments:
Post a Comment